Common Mistakes in Real Estate Photo Editing and How to Avoid Them
In the fast-paced real estate industry, high-quality visuals are essential for capturing buyers’ interest and making a lasting impression. Real estate photo editing helps transform raw images into visually appealing photos that highlight a property’s best features. However, even experienced editors can make mistakes that affect the final result. Understanding these pitfalls and how to avoid them ensures property images look stunning and realistic, boosting sales and engagement.
With online property listings on the rise, first impressions matter more than ever. A poorly edited photo can deter buyers, while a well-balanced, professionally edited image generates interest and leads to faster sales. Mastering real estate photo editing is vital for real estate agents, photographers, and editors alike.
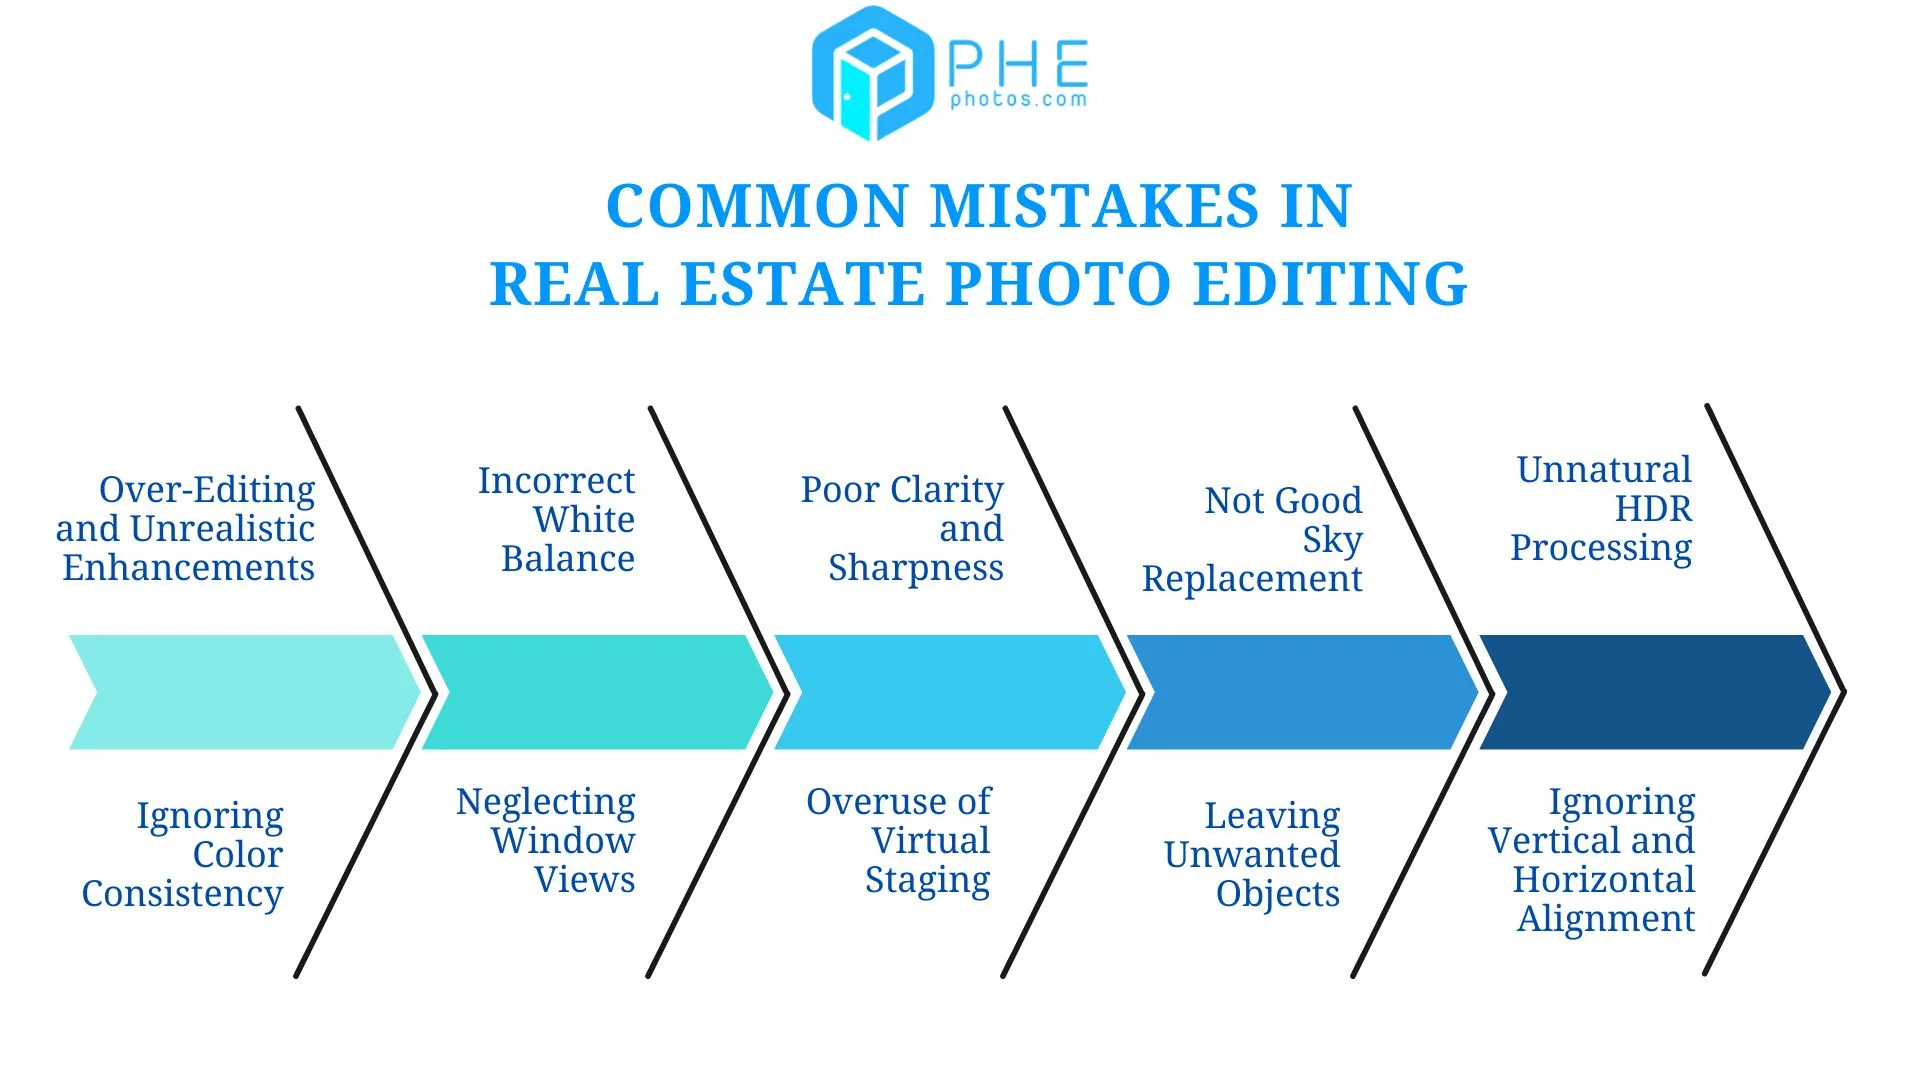
1. Over-Editing and Unrealistic Enhancements in Real Estate Photo Editing
The Mistake
One common error in real estate photo editing is excessive processing. Over-brightened interiors, oversaturated colors, and unnatural sky replacements can make a property look fake, leading to buyer distrust. If photos look drastically different from the real property, buyers may feel misled.
The Solution
Maintain a natural balance. Adjust brightness, contrast, and saturation subtly to enhance the image while keeping it realistic. Use sky replacement carefully, ensuring it matches the natural lighting in the scene. Real estate photo editing software with AI-assisted adjustments can help maintain a natural feel.
2. Incorrect White Balance
The Mistake
If white balance is incorrect, rooms may appear too warm (yellowish) or too cool (bluish), misrepresenting the true ambiance of a space. This can make a home look artificial or uninviting.
The Solution
Use color correction techniques to balance whites accurately. Adjust temperature and tint settings based on the property’s natural lighting. Compare the edited version with an unprocessed image to ensure realistic colors.
3. Poor Clarity and Sharpness
The Mistake
Blurry or overly sharpened images can make details look unnatural. Lack of clarity makes rooms appear dull, while excessive sharpening creates a harsh, artificial effect. Over-sharpening also introduces noise, reducing overall image quality.
The Solution
Use moderate sharpening techniques. Apply clarity adjustments selectively to highlight important details like furniture and textures without distorting image quality. Always zoom in to check whether fine details remain natural after sharpening.
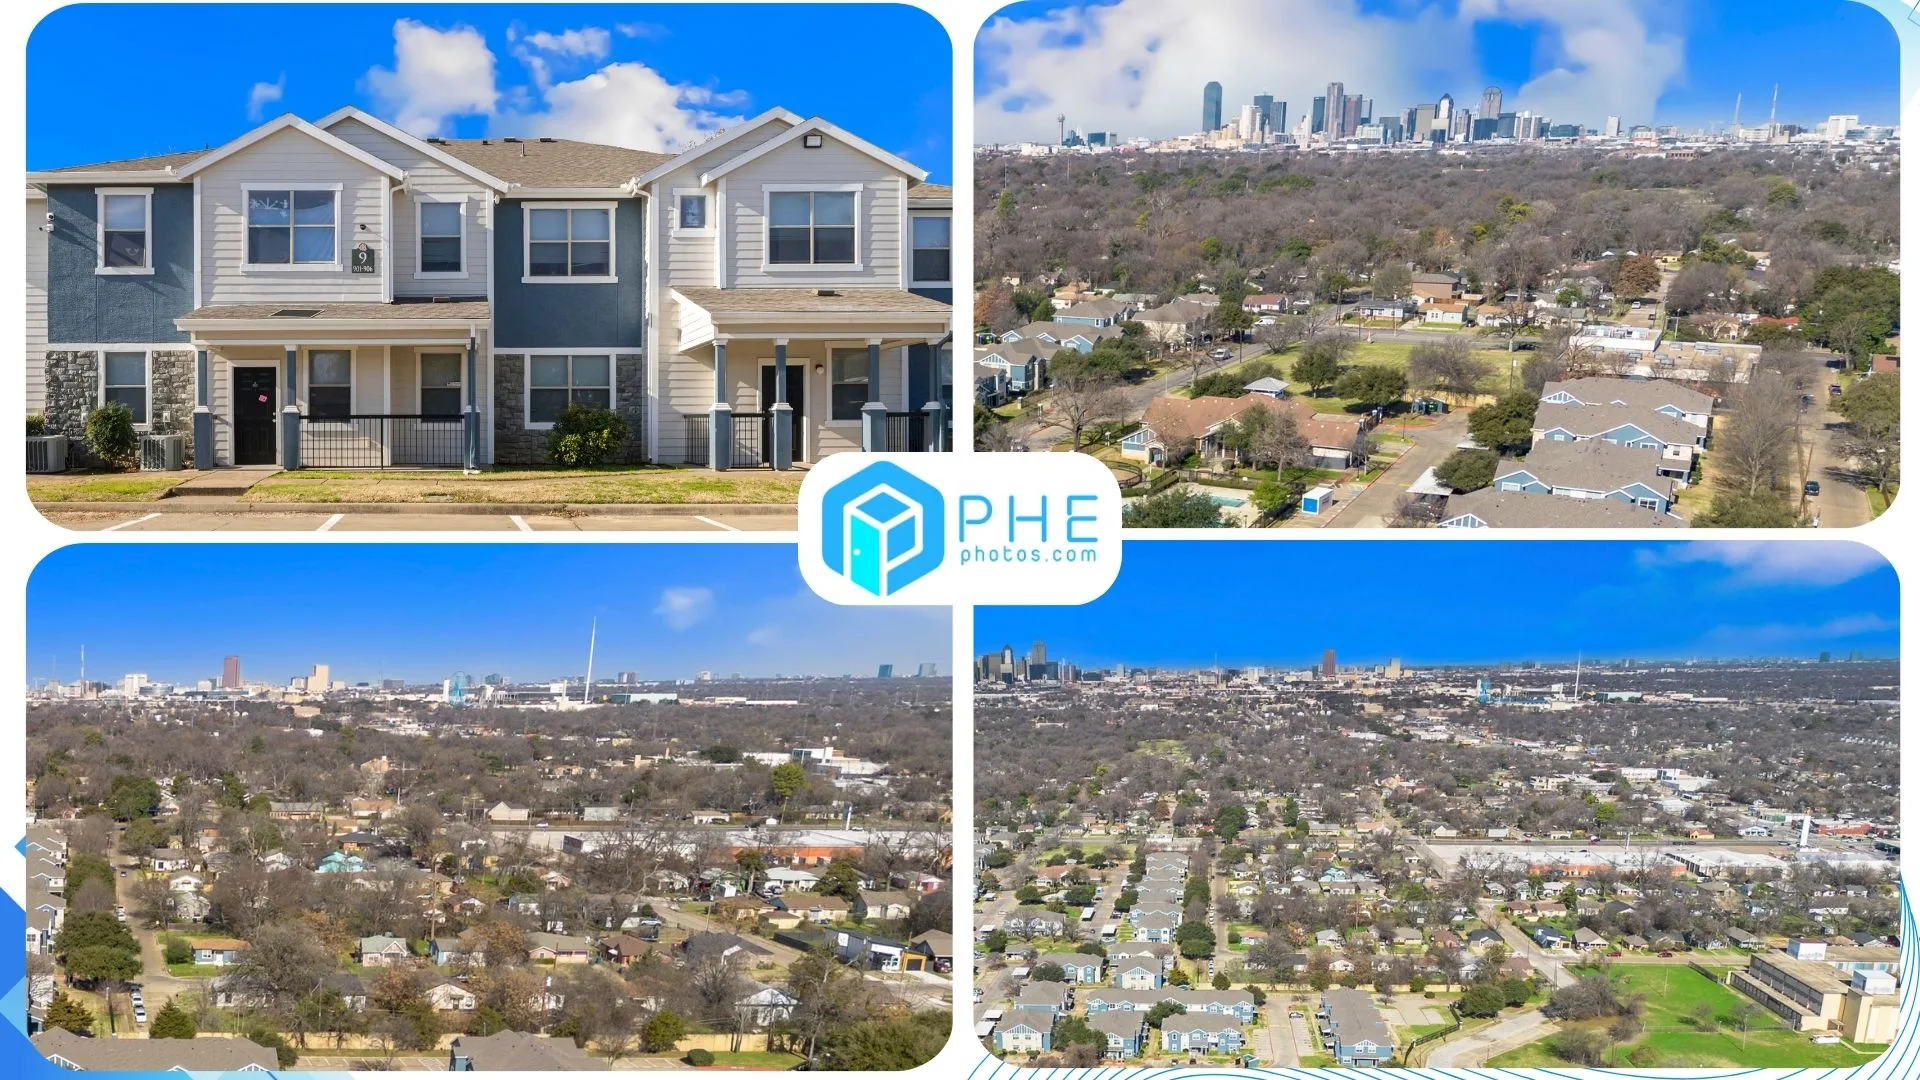
4. Sky Replacement That Doesn’t Match the Lighting
The Mistake
Replacing a cloudy sky with a bright blue one without considering the property’s lighting makes the image look fake. If the house has dim lighting, an overly sunny sky replacement creates unrealistic contrast.
The Solution
Ensure the new sky aligns with the scene’s natural lighting. If the house has soft shadows, avoid using a midday sky with harsh lighting. Match brightness and shadows for a seamless effect. Many real estate photo editing tools now offer automated sky replacement features that adjust lighting accordingly.
5. Unnatural HDR Processing in Real Estate Photo Editing
The Mistake
High Dynamic Range (HDR) blending is useful but can be overdone, leading to exaggerated colors and shadows. This can make interiors look cartoonish rather than warm and inviting.
The Solution
Use HDR merging techniques carefully. Maintain balanced exposure where details in both shadows and highlights are visible without making the image look artificial. Proper HDR processing enhances details while keeping the image realistic.
6. Ignoring Vertical and Horizontal Alignment for Editing Real Estate Photos
The Mistake
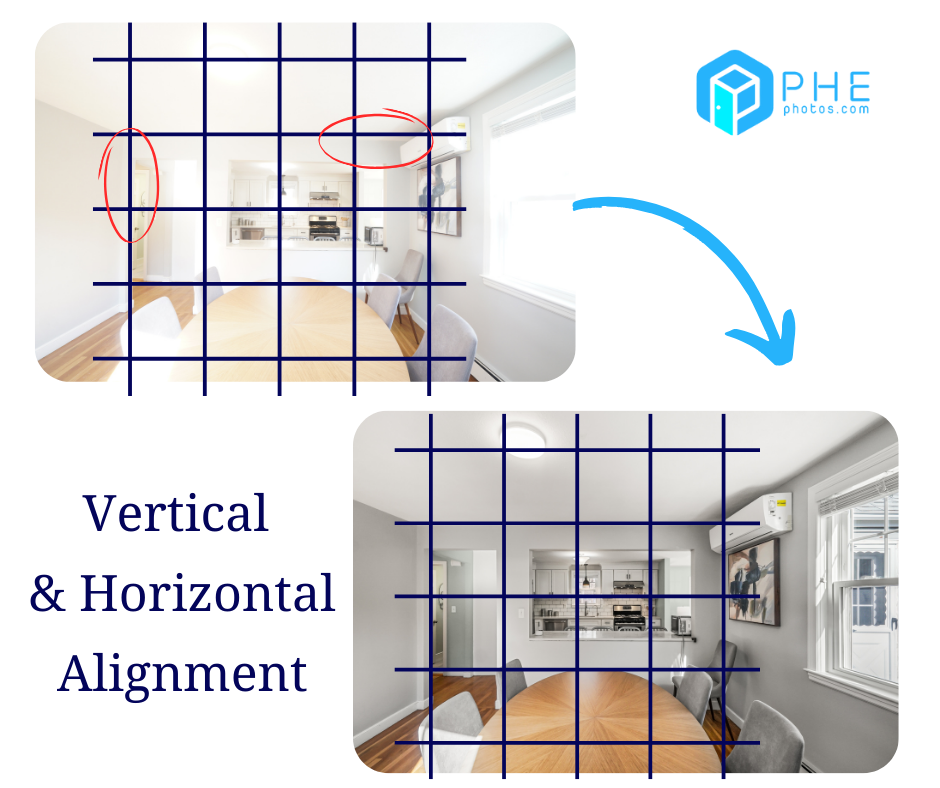
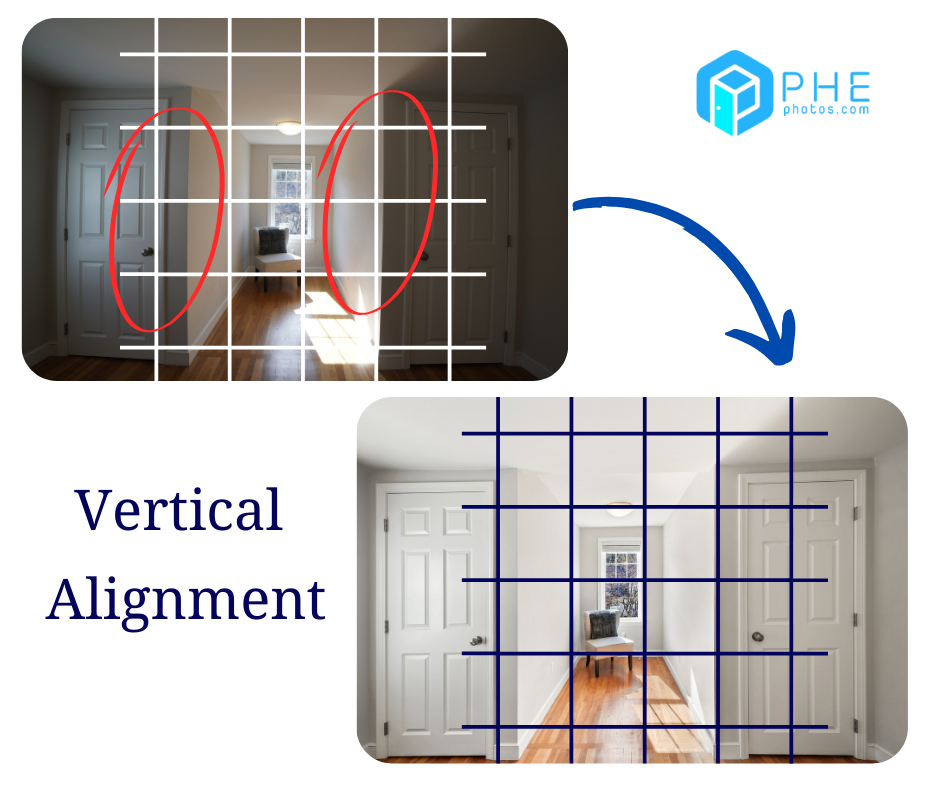
Misaligned verticals and horizontals can distort a room’s perception. If lines aren’t straight, spaces may look tilted or unbalanced.
The Solution
Use perspective correction tools to straighten vertical and horizontal lines. Ensure doors, windows, and walls are aligned correctly for a professional look. Most real estate photo editing software includes built-in alignment tools.
7. Leaving Unwanted Objects in the Frame
The Mistake
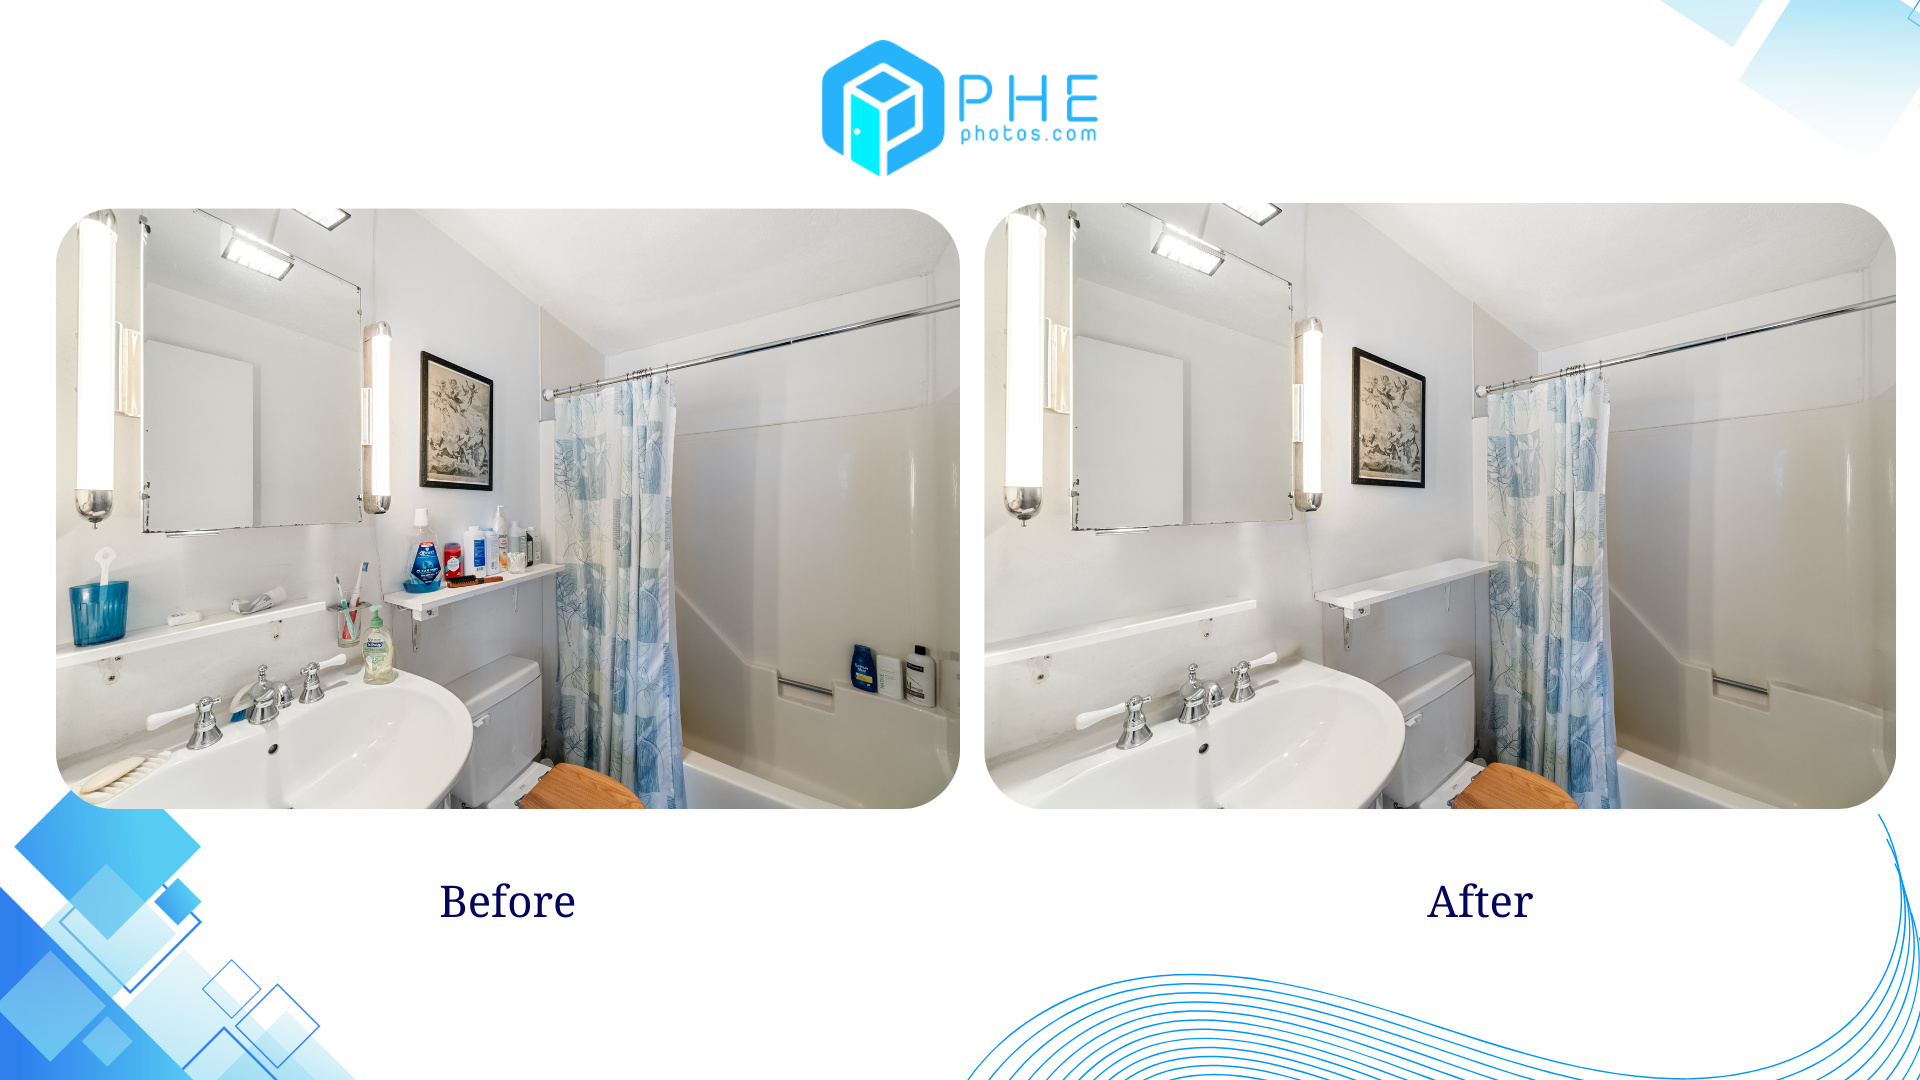
Objects like power cords, personal belongings, or clutter can distract buyers and reduce the property’s appeal. Even minor details can make a listing look unprofessional.
The Solution
Use object removal in real estate images to clean up photos. Remove unnecessary items for a neat and inviting look while ensuring the space remains realistic. AI-based object removal tools simplify this process.
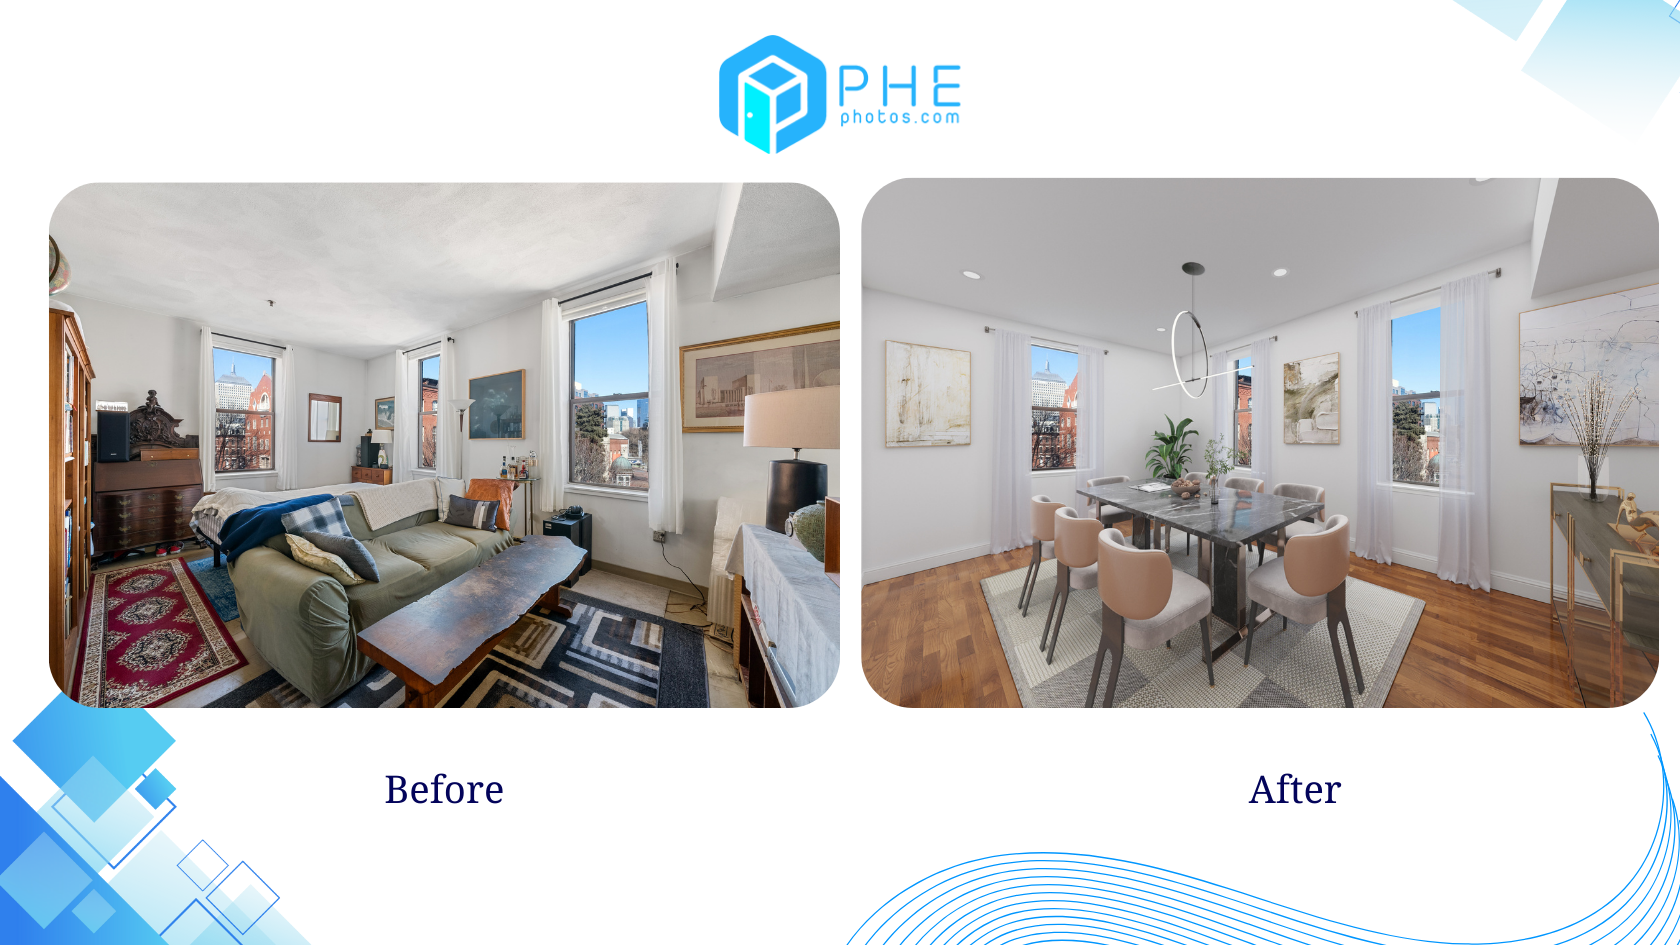
8. Overuse of Virtual Staging for Editing Real Estate Photos
The Mistake
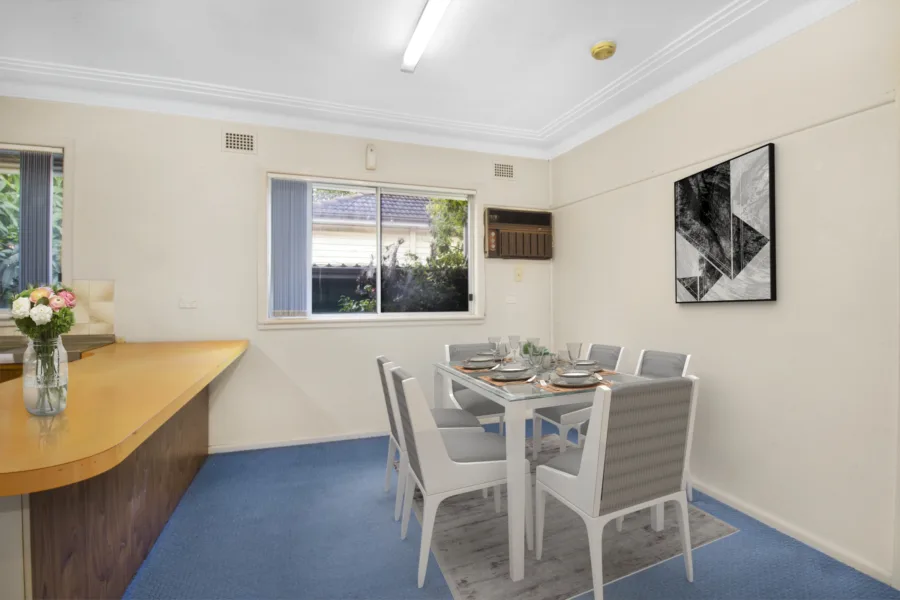
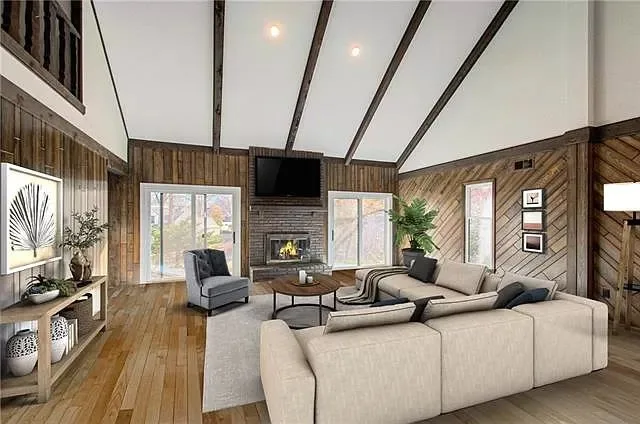
While virtual staging for real estate is a powerful tool, adding excessive furniture or unrealistic decor misleads buyers and creates disappointment during viewings. If furniture is oversized or poorly placed, it distorts space perception.
The Solution
Keep virtual staging minimal and realistic. Use neutral, modern furniture that complements the space and maintains proportionate scaling. Ensure virtual staging elements match the home’s style rather than appearing generic or out of place.
9. Neglecting Window Views
The Mistake
Bright interior edits that wash out window views make a property feel closed off or less inviting. Overexposed windows erase the scenery, reducing the overall appeal.
The Solution
Use exposure blending techniques to retain both the interior details and the outdoor view. Adjust highlights to bring back details in windows while ensuring the interior remains well-lit and balanced.
10. Ignoring Color Consistency Across Images
The Mistake
Editing each image separately without maintaining consistent tones and colors results in an unprofessional and disjointed listing.
The Solution
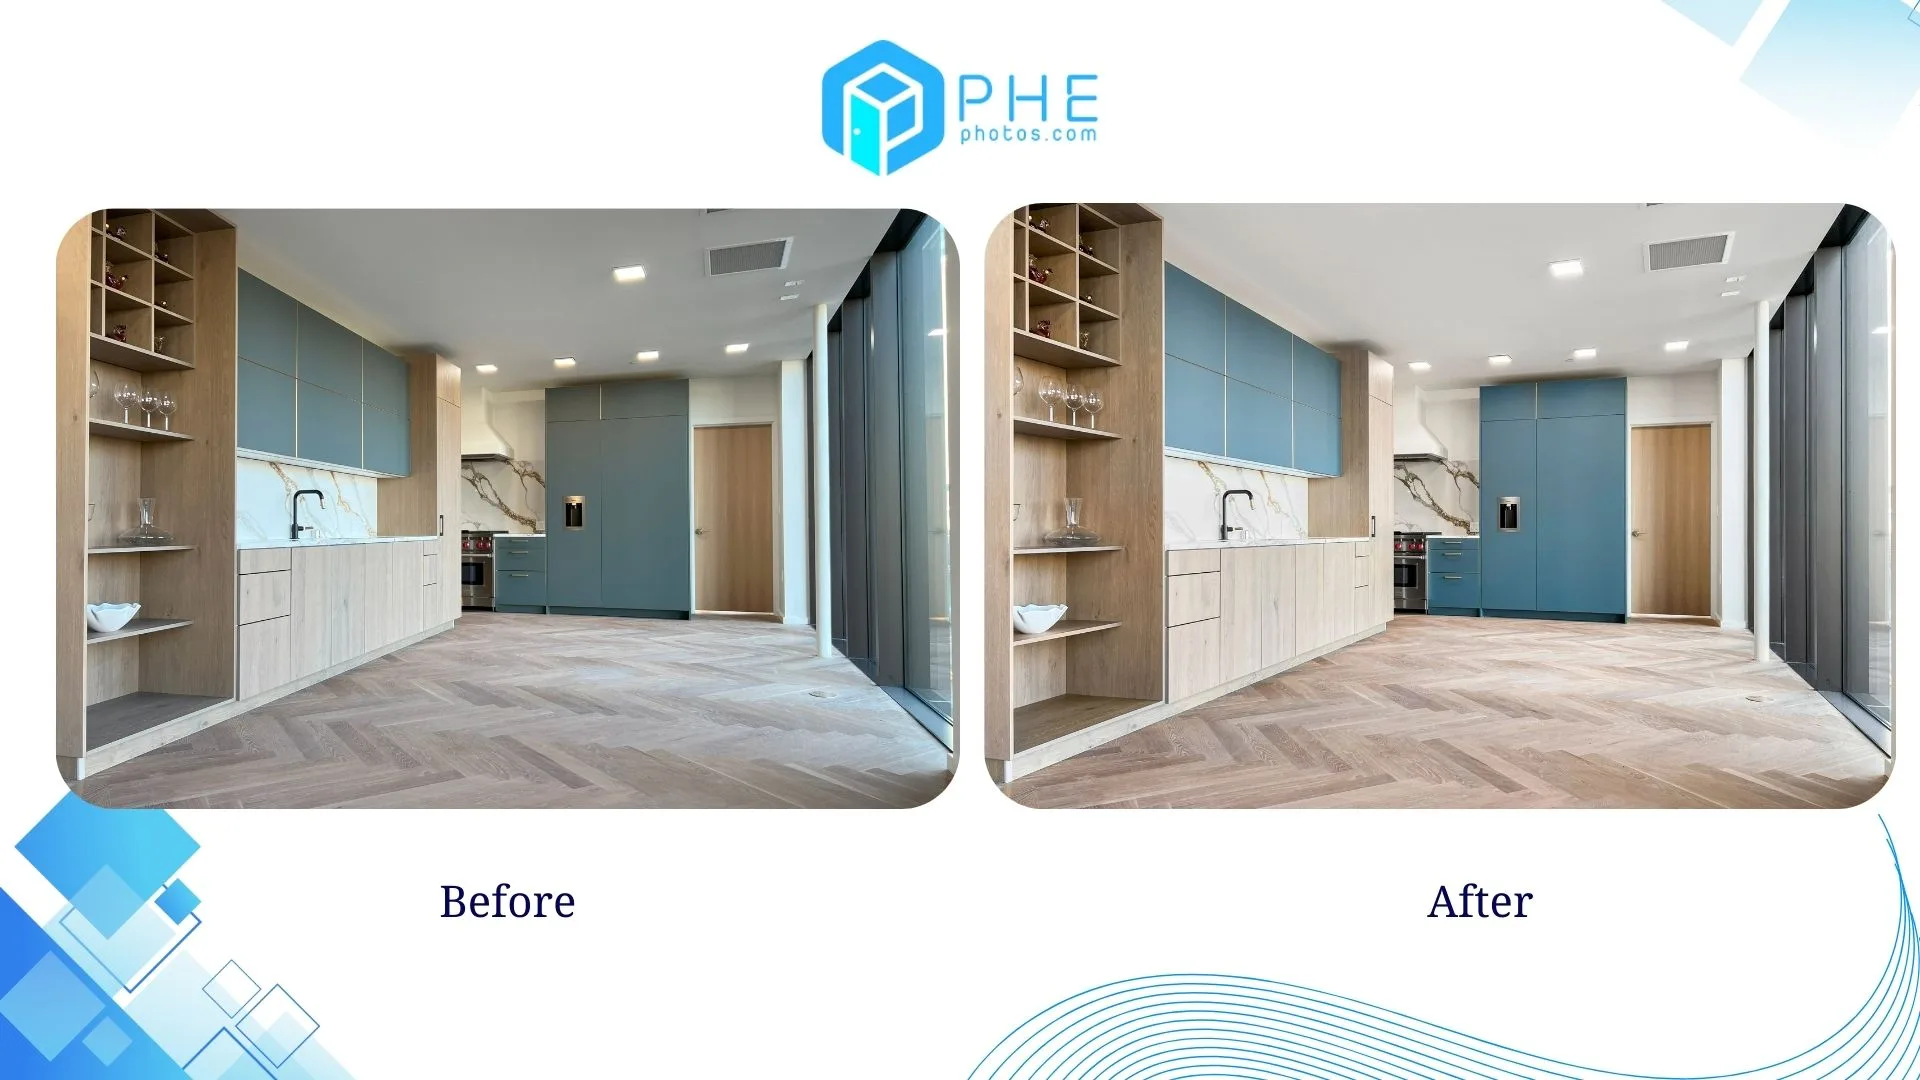
Use batch editing and presets to ensure color harmony across all images in a listing. Maintain uniform white balance, saturation, and exposure settings so that the property looks cohesive and appealing in all its photos.
Conclusion
Avoiding these real estate photo editing mistakes enhances property image quality and effectiveness. By maintaining natural tones, aligning perspectives, and using editing techniques wisely, you can create visually stunning real estate photos that attract buyers and drive sales. Whether editing images yourself or working with a professional real estate photo editing service, focusing on realism and quality always yields the best results.
For more:
The Role of Real Estate Agents in Today’s Market: A Guide for Buyers and Sellers
Best Free Real Estate Photo Editing Software for Stunning Property Images
Flambient Photography: The Ultimate Guide to Elevate Real Estate Photos

